Steps to create campaign.
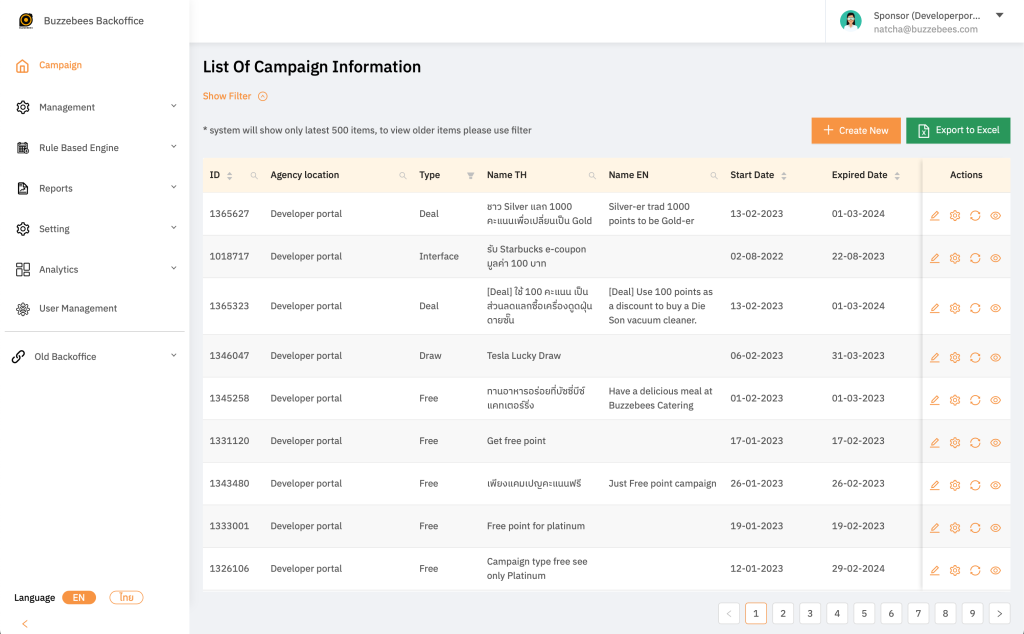
Once log in, tabs will be displayed to user which they can use to create campaign as follows:
- Log in to the system
- Click “Create New”
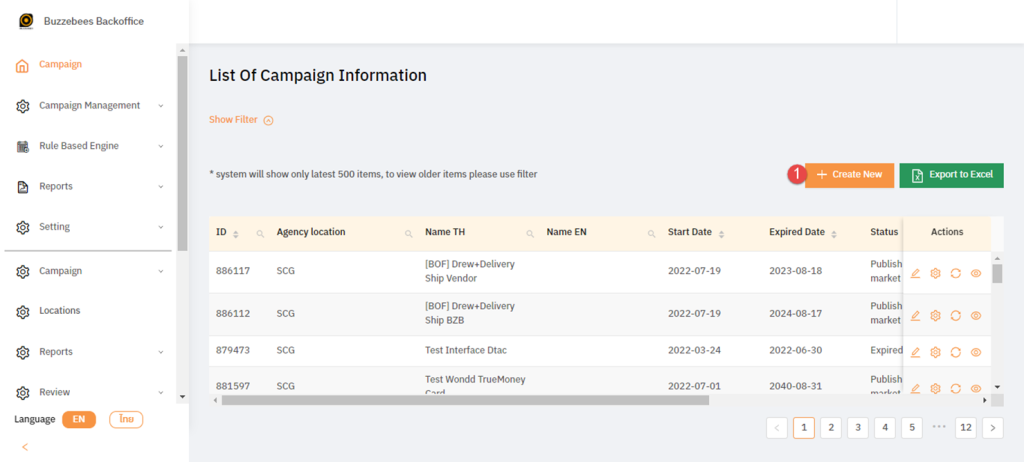
- If log in by Sponsor, it will choose Agency for you automatically. If log in by Admin, user must choose Agency manually.
- Once Agency is chosen, click “Next”

- Types of campaign is for user to choose campaign type including 11 types as per below:
- Draw: Create campaign to win a reward
- Free: Create campaign to redeem a reward (use points for redemption)
- Deal: Create campaign to get code
- Buy Create campaign for products and services by setting price per piece
- Ads: Create Ads campaign and collect data via Survey to get special points
- Install: Create Install application campaign to get special price
- Interface: Create campaign to allow API connected with the third party and receive privilege both for earning and redeeming points which can be separated into 4 sub-categories:
- Get Interface: Redeem to get points immediately
- Get Web Interface: End process outside application by sending via API to get points.
- Use Interface: Redeem and points deducted immediately
- Get Web Interface: End process outside application by sending via API to get points.
- Event: Create campaign for news and announcement (Click Publish to immediately publish campaign regardless Start Date / End Date)
- News: Create campaign for news and announcement (campaign will be published as Start date / End date)
- Media: Display VDO URL link on application
- 6. Click “Next” for the next step to create campaign
 7. Fill out details on campaign detail
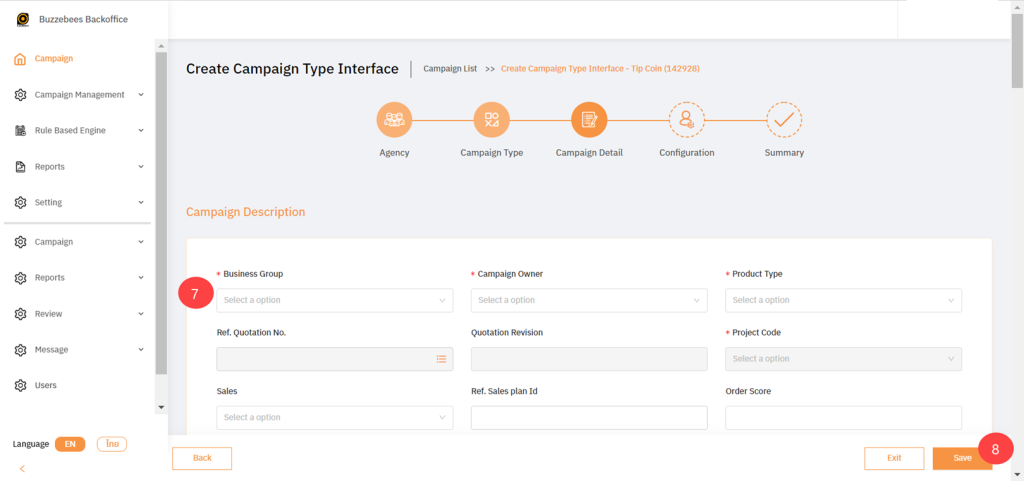
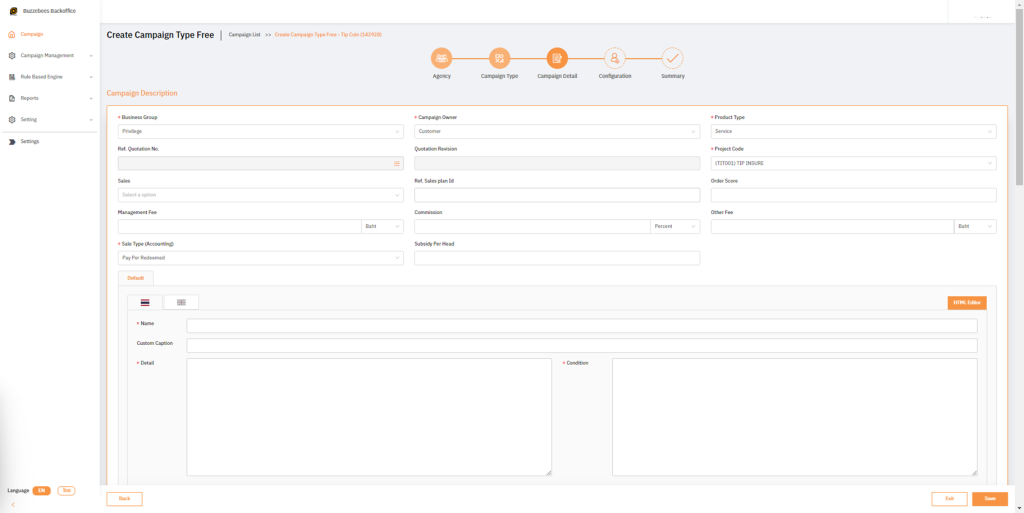
- 7.1 Filling out campaign descriptions
- Business Group: Select group of campaign
- Campaign Owner: Select to create Buzzebees or customer campaign
- Product Type: Select type of campaign
- Ref Quotation No.: Select Ref quotation No.
- Quotation Revision: By selecting Ref. Quotation No.
- Sales: Select campaign owner (name of salesperson derived from system that admin created)
- Order Score: for priority campaign sorting
Order Score: rate score to prioritize campaign (XXX)
- Commission: Campaign system rental fee
- Other Fee: Select calculation unit of system rental fee which is next to Commission including Percent (Percent of total sales), Fixed / Item (price per piece), Fixed / Campaign (price per campaign)
- Language: Select language for campaign (Name, Detail, Condition will be changed upon checking on application and some specific applications are required to fill out both Thai ad English unless page may be blank).
- Name: Fill out campaign name
- Custom Caption for customize redeem button text
Custom Caption: Create redemption box
- Detail: Fill out campaign conditions and documents
7.2 Filling out campaign details
- Group: Display campaign group mostly categorizing by Agency of Sponsor application
- App Categories: Display all categories in application, arranged by product or campaign category. User must select category for their campaign.
- App sub Category: Category list used with report of privilege team. User must select category as defined by privilege team (you don’t need to fill out if no data available)
- Start Date: the start date of campaign
- Expire Date: the end date of campaign
- Quantity: The total of campaigns that users can use
- Maximum / Person: Limit privilege for 1 person by specifying number, for example, 2 means user can redeem this privilege twice only
- Original Price: Set the original price of products or services before discount
- Price / Unti: Actual price of products and services after discount percent deducted
- Discount: Enter percent for products and services discount
- Point / Unit: Set points of campaign (Earning or redeeming points depends on type of campaign)
- Point Type: Specify if this campaign is for Get Point or Use Point
- Privilege Categories: Select product or campaign category which is suitable for your campaign

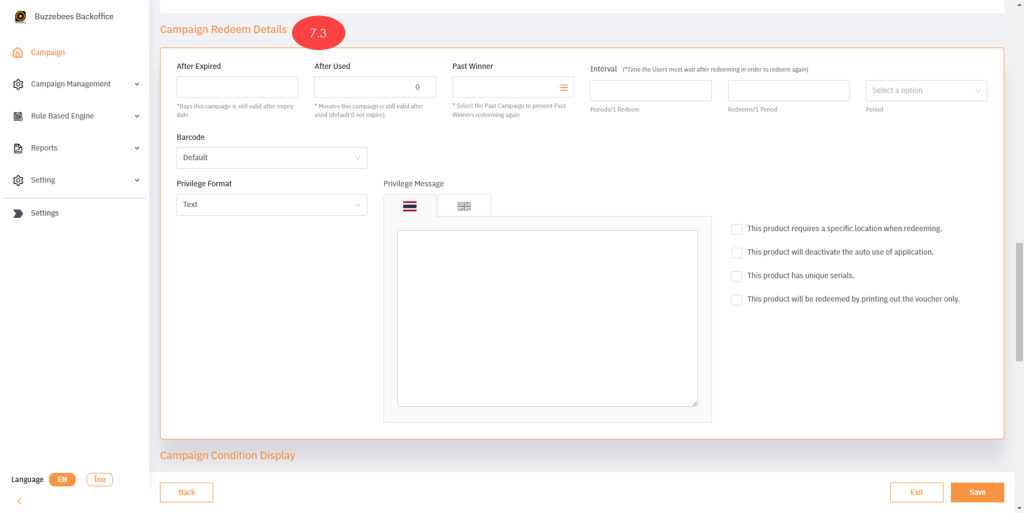
7.3 Filling out campaign redemption detail
- After Expire: Set period that allows client to use their privilege after redeemed on redeemed history though campaign expires, but it won’t display on privilege tab.
- After Use: Set period after code is redeemed as minute (recommended maximum minutes at 1,440 minutes)
- Past Winner: Set to allow user to select one of the 2 campaigns only
- Interval: Set period of redemption which is consisted of 2 parts:
- Periods / 1 Redeem: Set period for single redemption
- Redeems / Period: Set period for redemption period such as Day, Week, Month etc.
- Use interval by selecting period such as month
- For example: Free car wash campaign for customer who has 2 rights per month: Set Redeems / Period = 2 meaning customer can redeem their privilege twice in 1 month. In case you want customer to redeem only once per 4 month, you have to set Periods / 1 Redeem=4
- User Type: Set user level for campaign redemption
- User Visibility: Set campaign visibility of user
- Redeem Media: Set type of code displayed
- Barcode: Set type of code displayed including Barcode, QR Code, and Text Code
- Privilege Format / Privilege Message: Set reply message once user is completely redeemed
7.4 Filling out information regarding campaign condition display
You can create alert message if user does not follow privilege conditions as image below:

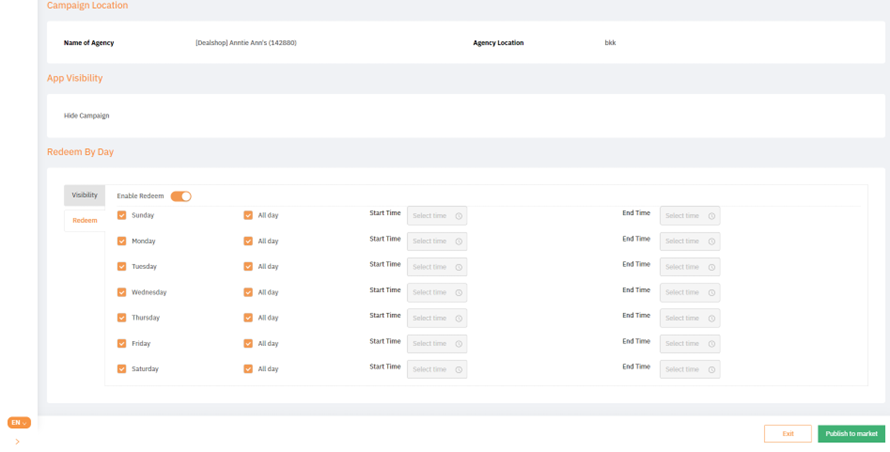
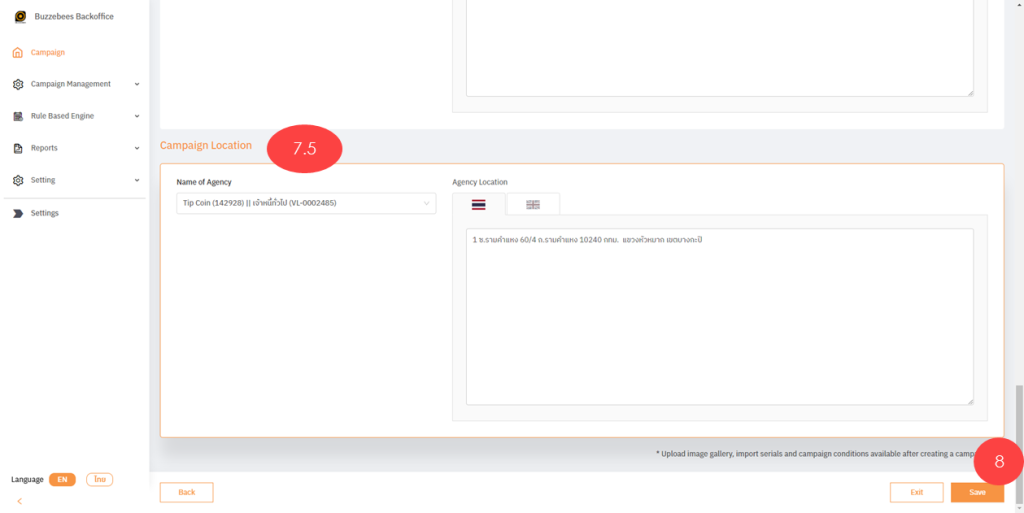
7.5 Filling out campaign location
On back office, there are agency’s addresses which is saved via registration function and you can select to show those addresses on application, to let user visit any branches they prefer. You can create campaign by following the steps below:
- Select Name of Agency regarding products and services
- Agency Location: Derive from Agency data on system
- 8. Once you’ve finished, click “Save”
- Display Configuration page which consisted of menus as below:
9.1 Interface Setting: To set campaign interface, this page will display if you select campaign interface type only
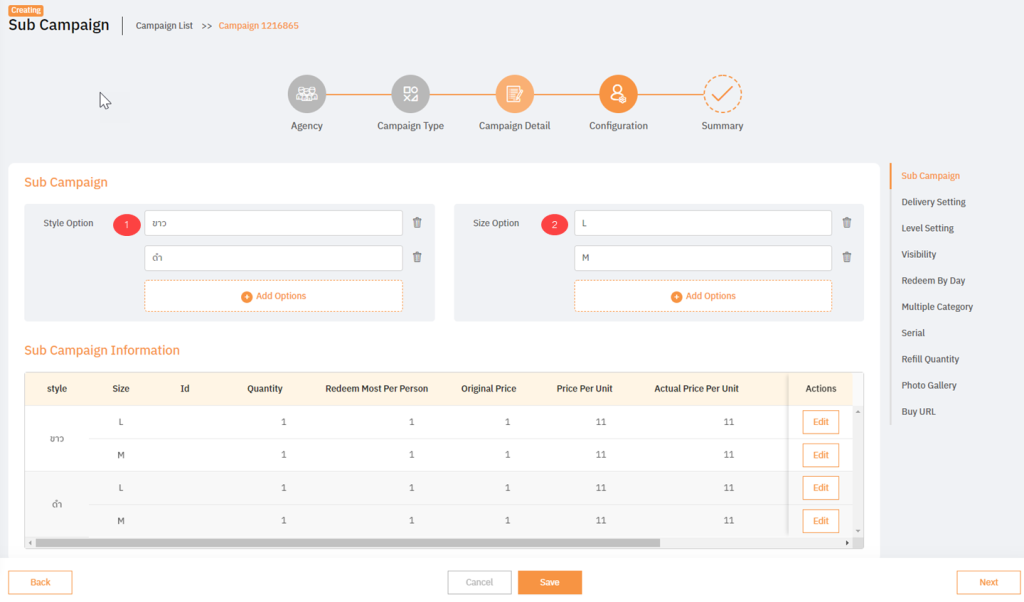
9.2 Sub campaign: To set style option and size option (Buy type only)
9.3 Delivery Setting: To select order type, delivery type, and vendor stock API etc.
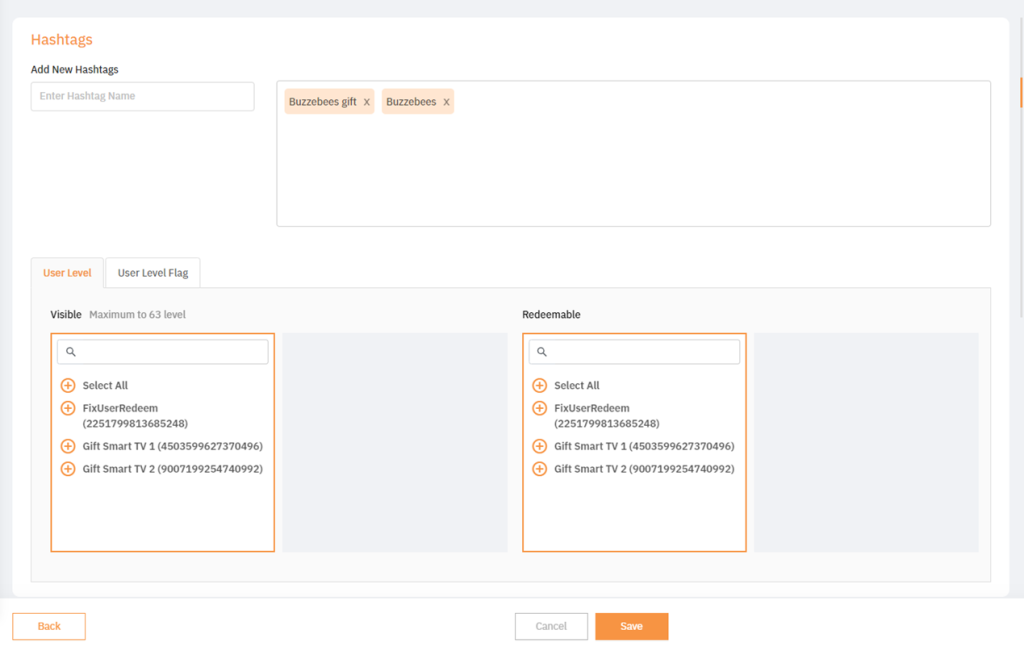
9.4 Level Setting: To set hashtags and user level, user level flag
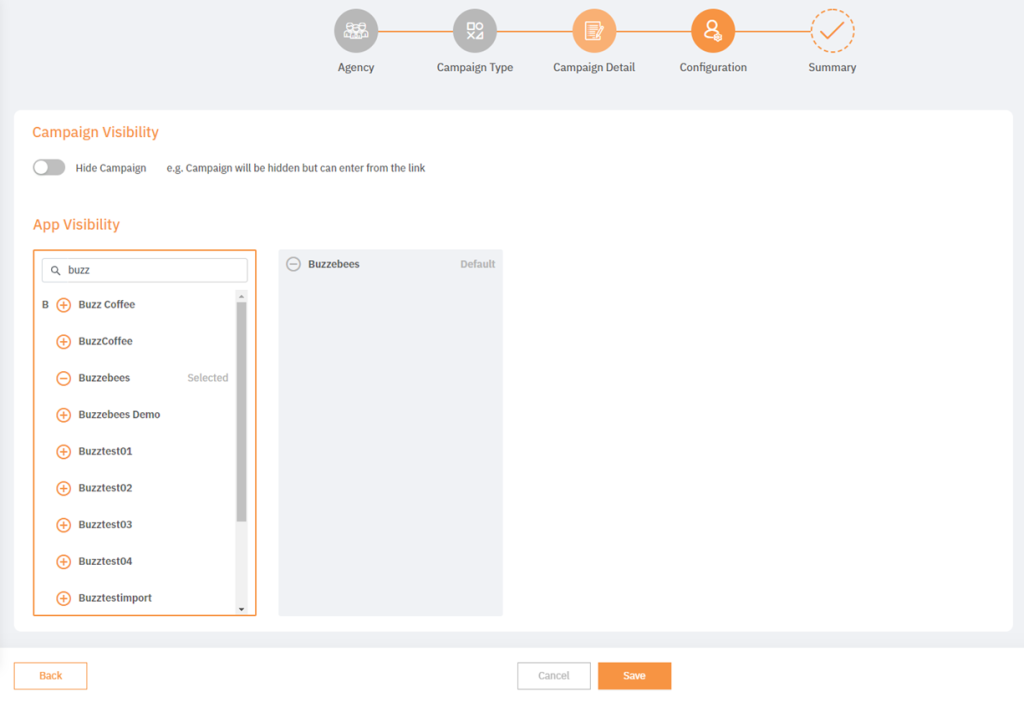
9.5 Visibility: To hide campaign or select application for campaign
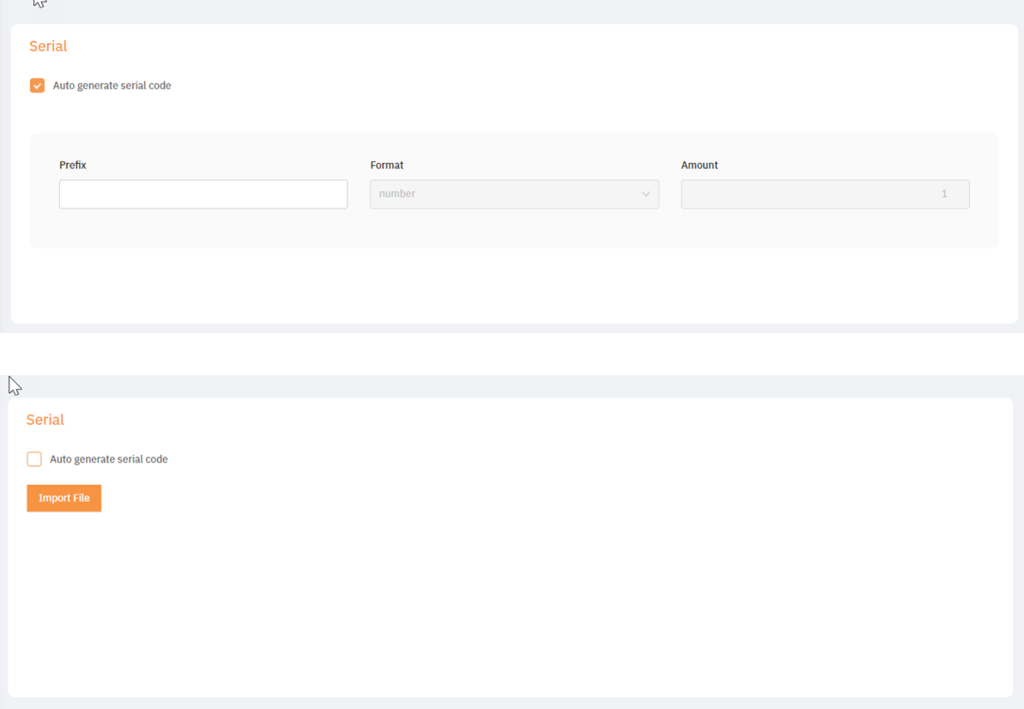
9.6 Serial: To set if you want to generate code (serial) automatically or import manually
9.7 Refill Quantity: To add quantity by period specified
9.8 Photo Gallery: To insert banner for campaign (required to set prior to publishing)
9.9 Buy URL: Gen link page only for Buy type

9.1 Interface Setting: To set campaign interface, this page will display if you select campaign interface type only

9.2 Sub campaign: To set style option and size option (Buy type only)
9.3 Delivery Setting: To select order type, delivery type, and vendor stock API etc.

9.4 Level Setting: To set hashtags and user level, user level flag
9.5 Visibility: To hide campaign or select application for campaign
9.6 Serial: To set if you want to generate code (serial) automatically or import manually
9.7 Refill Quantity: To add quantity by period specified

9.8 Photo Gallery: To insert banner for campaign (required to set prior to publishing)

9.9 Buy URL: Gen link page only for Buy type

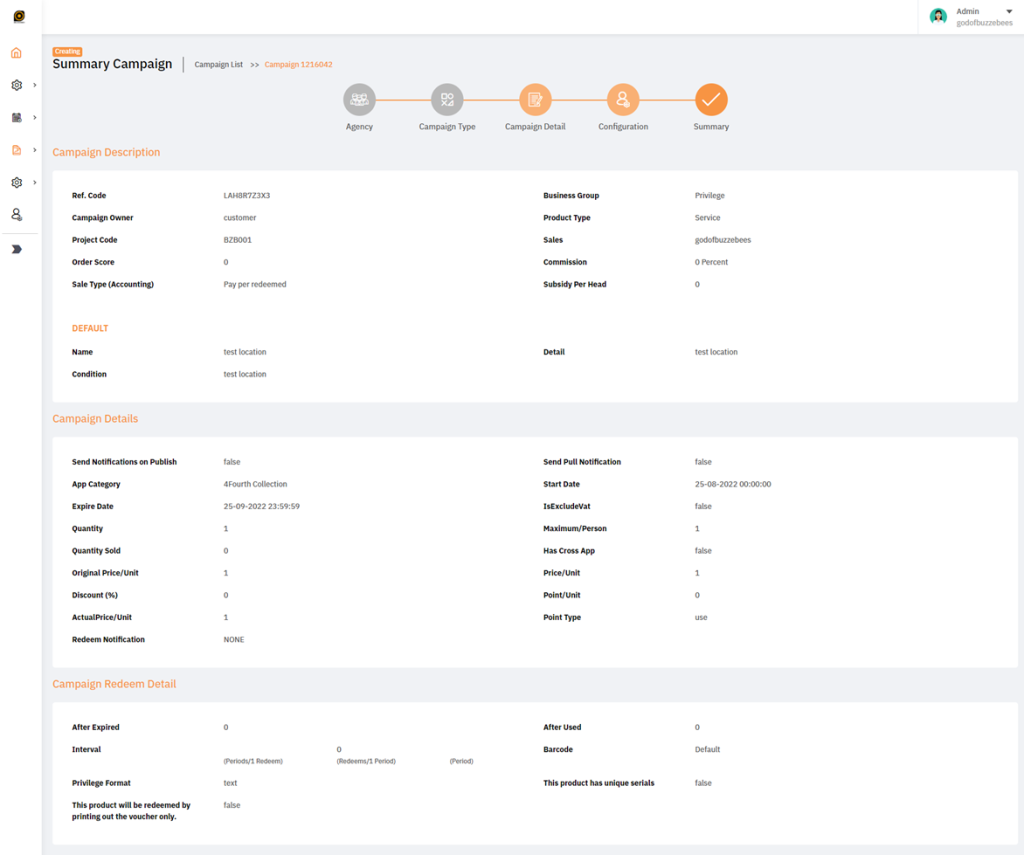
10. Display summary page with all user details filled out
11. Click “Publish to Market” to publish campaign on application